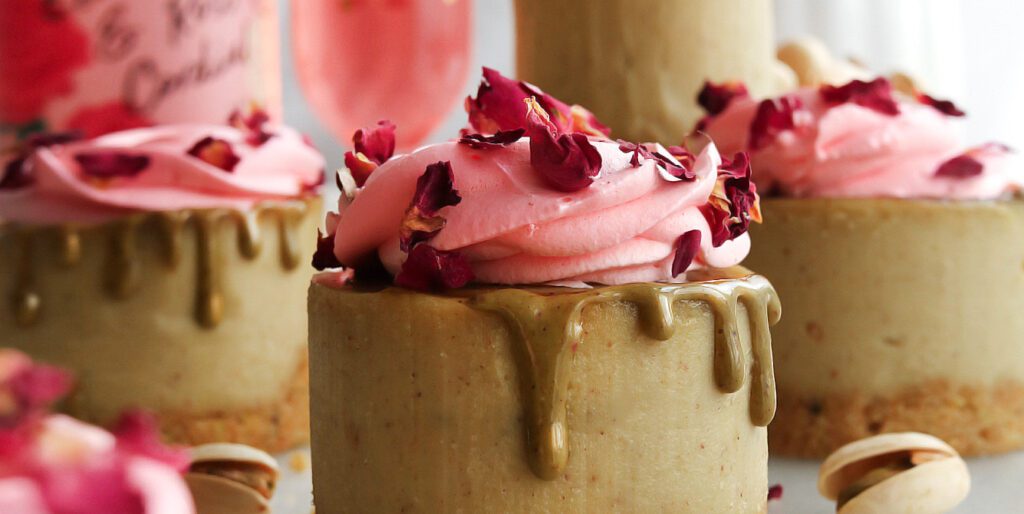
Pistachio, Elderflower and Rose Cheesecakes
These vibrant Raspberry and Lemon Mini Cheesecakes are completely vegan and bursting with fruity flavour. Made with Belvoir Farm Raspberry and Lemon Cordial, they’re fresh, tangy, and beautifully indulgent. Perfect for entertaining guests or enjoying as a little sweet treat, these gorgeous individual desserts are simple to make and sure to impress.
Ingredients
For the base
| 40g | Dairy-free butter |
| 100g | Plain biscuits |
| 30g | Pistachio nuts |
For the cheesecake filling
| 125g | Cashew nuts (see step 1) |
| 260g | Vegan cream cheese |
| 75g | Icing/powdered sugar |
| 1 tsp | Vanilla bean paste/vanilla extract |
| 50g | Coconut cream |
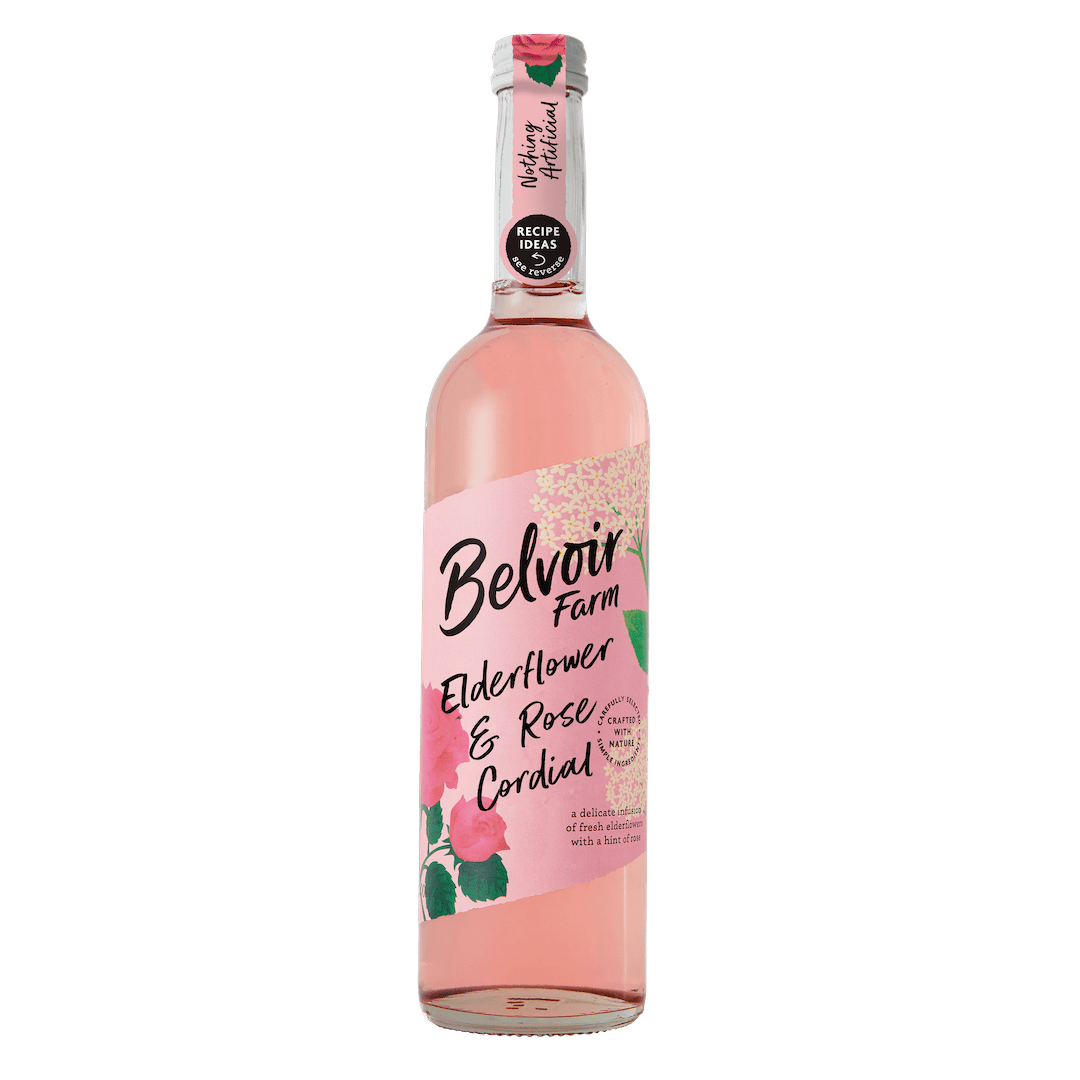
| 40ml |
Belvoir Farm Elderflower and Rose Cordial |
| 80g |
Pistachio butter |
For the cream
| 220ml | Dairy-free whipping cream |
| – | Pink food gel |
| – |
Edible rose petals |
Method
To Make
- To make the base, grease a 6 hole loose base / push up cookie cup tin with some dairy-free butter.
- Add the dairy-free butter into a small saucepan, place on the hob and heat over low until fully melted. Remove from the heat and add into a medium sized, heat-proof mixing bowl.
- Add the biscuits and pistachio nuts into a blender / food processor and blend until fine. Pour the biscuit crumbs into the melted butter and stir together using a wooden spoon or spatula. It should resemble wet sand, and when you press it between your fingers, should hold its shape. If it’s too wet, add in some more biscuit crumbs, if too dry, add in some more melted butter.
- Press approximately 1 & 1/2 tablespoons of mixture into each tin, making sure to compact it in using clean hands or spoon. The more compact it is, the less likely it will crumble. It’s best to use a loose base tin, I’ve linked a great one here.
- Place aside whilst you make the filling.
- To make the cheesecake filling, the cashew nuts will need to be soaked overnight in water.
- Drain the cashew nuts from the water and place them into a food processor/blender along with the dairy-free cream cheese, icing sugar, vanilla, coconut cream and rose cordial and pistachio butter. Whizz up on high speed for around 5 minutes until smooth. Add some more coconut cream if needed. I use a ‘Kitchenaid Powerplus blender’ . It’s best to use a high-speed blender if possible as the mixture is quite thick, and you want it as smooth as possible. You might need to stop the mixture a few times and scrape down the sides to make sure everything is incorporated and smooth.
- Equally pour the mixture into each tin. Make sure to tap the cheesecakes onto the worktop to remove any air bubbles.
- Optional: Swirl some pistachio butter on top of each cheesecake before chilling.
- Place into the fridge overnight to set.
- Once set, remove from the fridge, and push out the cheesecake (as the base is loose bottomed). To make it easier, place the tin into the freezer for 15 minutes to help firm up the cheesecakes, then slide a knife around the edges of the cheesecakes to help loosen them from the tin. Making the cheesecakes firmer will help push them out the tin and won’t damage them.
- To make the cream topping, whip up the whipping cream (either in a stand mixer fitted with balloon whisk attachment, or with an electric hand whisk) along with a small drop of pink / red food gel until it holds a peak.
- Transfer the cream into a piping bag fitted with a medium star tip nozzle, we recommend a Wilton 2D tip.
- Pipe a swirl / rose swirl on top of each cheesecake.
- Finish with a sprinkle of some edible rose petals (optional)
Don’t forget to tag us in your bakes!